This post may contain affiliate links. Read my Disclosure Policy to learn more.
If you have ever wondered how to trace vintage Burda patterns from retro sewing magazines – then read on. In this deep dive post, I am showing not just how to trace but also how to avoid the mistakes that I have made throughout the process. But first, the elephant in the room.
You must be wondering why on earth would you want to even put yourself through the process of tracing from the older Burdas? I get it – I was there myself but when I got to see the retro sewing magazines I was hooked.
But wait? I don’t even know anything about Burda! I got you covered – head on over to my free sewing tutorials page to catch a quick Beginners Guide to Burda Magazine tutorial that will give you the starting point.
5 Excellent Reasons to sew with vintage Burda patterns.
- #1 The patterns are beautifully and elegantly designed (Check out my live streams on YT where I marvel at the designs every week).
- #2 Fashion is cyclical so you will be on-trend at least once every 10 years.
- #3 The magazines are packed with way more patterns into them than modern-day Burda does.
- #4 Its a great way to shake things up in your sewing life.
- #5 The magazines included some couture house designs from Karl Lagerfield, Yves St Laurent etc.
So now you are convinced to give them a try (wink, wink , nudge, nudge) You are probably thinking where will I get my hands on them. Heres the rundown on….
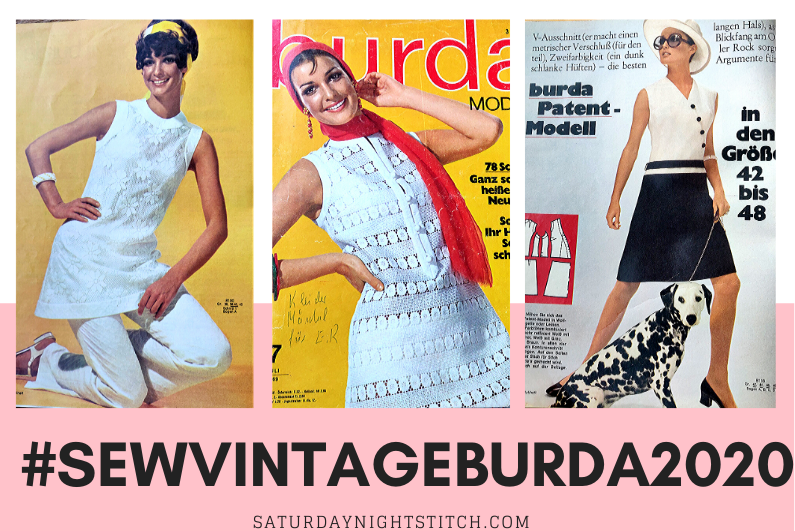
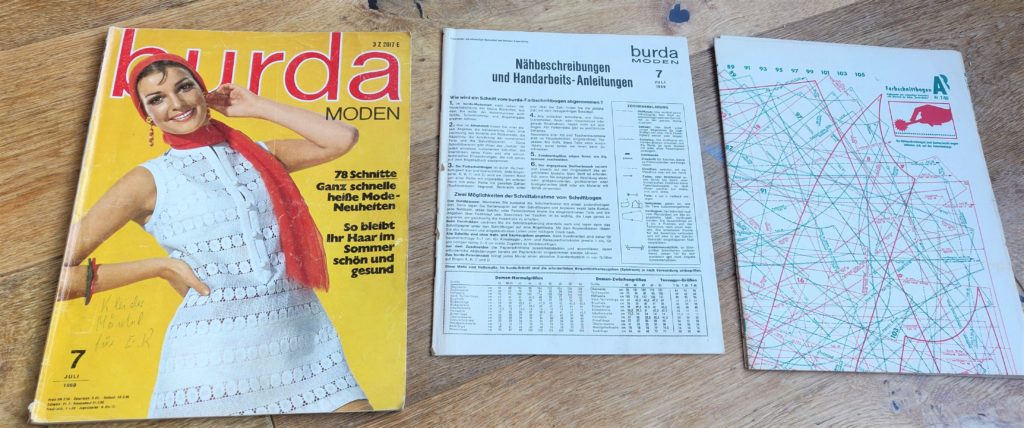
This post is a part of my series on sewing with vintage sewing magazines called #sewvintageburda2020. You can read the related posts about the sewing goal here and please check out the vintage July 1969 Burda issue browse through that I am sewing this project from.
Where to buy vintage Burda magazine sewing patterns.
You can buy the vintage magazines on second hand selling sites like eBay, Etsy, Facebook Market place among others. I have been buying mostly on eBay and have had a couple of bad experiences and here is my advice about buying, so you don’t make the mistakes that I made (hopefully) –
Advice on buying vintage sewing magazines.
Firstly, make sure to read the description. Check that it says the pattern sheets are whole and intact. I once bought one that came without any pattern sheets. And even worse pattern sheets in bad condition.
The pattern sheets are critical for the magazine so be also sure to ask to see pictures of the pattern sheets if none are available. Legit sellers won’t mind providing extra information when asked.
Before you get caught in a bidding war, decide your budget. Once you have a budget, look at the P&P price. I have been caught unawares with the P&P being much higher.
One thing I always check for is whether the item is from a smoke-free home. I can’t stand the smell of smoke on anything and in the past when I have bought things that turned out to be from “smokers” homes, I had to throw them out. Books and magazines are no different – they absorb that smell like crazy!
Bonus tip – you can ask for combined reduced postage if you buy more than one magazine from one seller. I always check out a seller’s other items to see if they have more retro sewing patterns that I might be interested in.
Once you have got your magazine and you have freaked out over the pattern sheets and you hit a snag. Fortunately, I have the solution – you make yourself a cocktail to calm your nerves and get some courage in a glass to start working on them.
Remember
if you can read – you can trace a vintage Burda pattern
me (2020)

How to trace vintage Burda patterns
Step 1 – Measure your bust, waist, and hip in cms. Burda is created in Germany where they use the metric system (which is more accurate btw!).
Step 2 – Check your measurements against the size guide. Do not assume that because you have sewn a Burda pattern in recent years that the size corresponds to the vintage magazine sizing table.
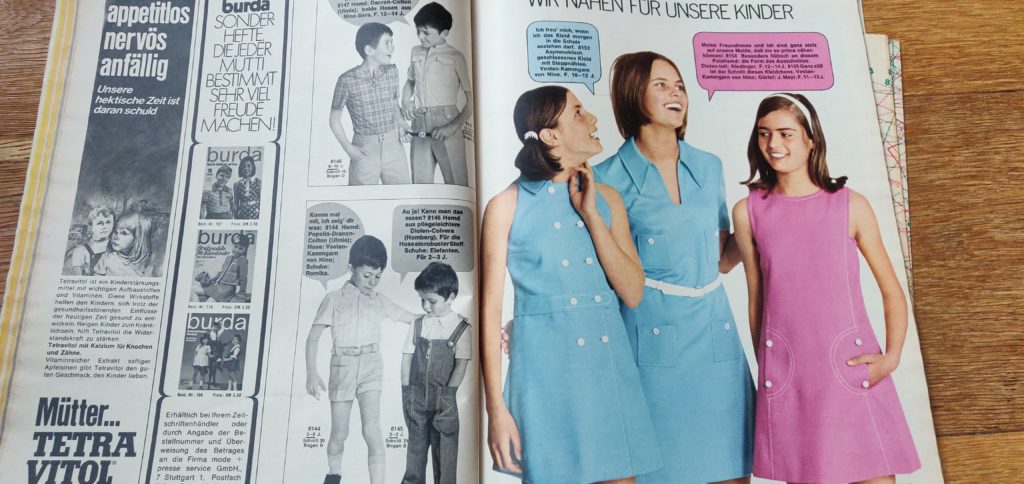
Step 3 – Browse through and see which patterns you like. This is one of the fun bits – you get to look through and see a slice of the history of what people, particularly seamstresses, were interested in. And the old adverts! They are so interesting and entertaining to look at. You are reminded of the fact that there was a time when marketing was actually about communicating information on products and services
Step 4 – Check if the style has your size. The vintage sewing magazine patterns sometimes come in only one size. So if you are not proficient in grading patterns – its best to just look for your size.
In my case, I was looking at 38/40 (in vintage Burdastyle magazines 38 & 40 were one size unlike present-day Burda wherein they are 2 separate sizes). If the design you’d love to sew is in your size, continue to Step 6. If not move to the next step.
Step 5 – Browse again and repeat until you find something that is in your size. Alternatively, if you are really into a particular sewing pattern, you can grade it to fit your size. The instruction booklet does include a section on grading. If you’d like to learn about grading sewing patterns, check out this class by Kathleen Cheetham.

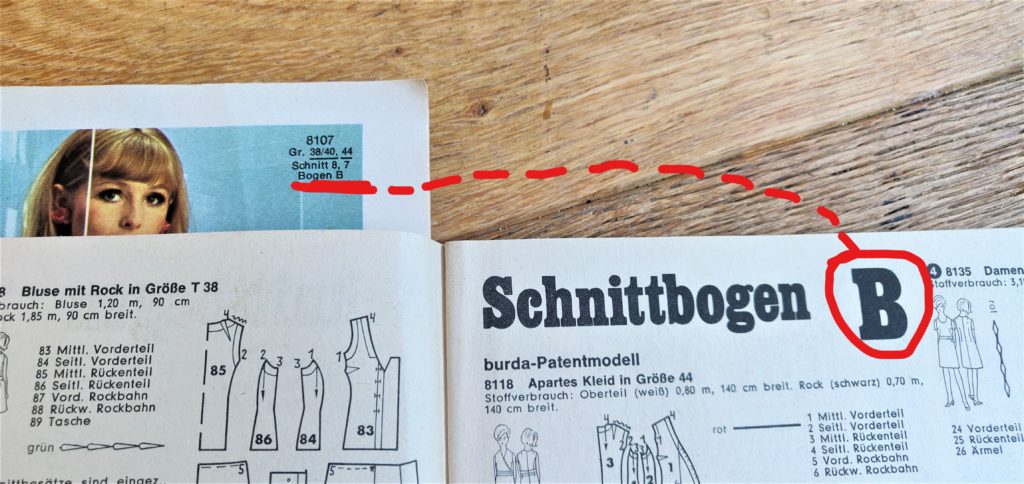
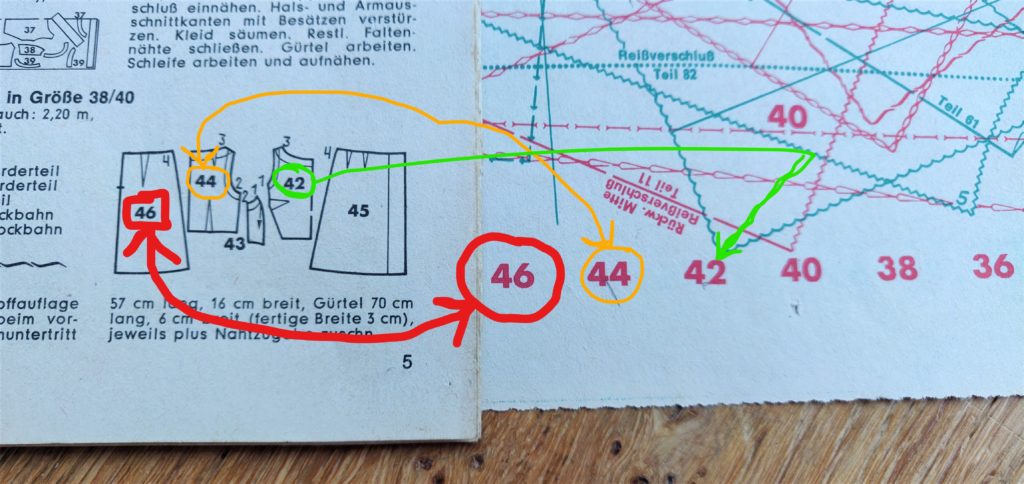
Step 6 – Find your pattern name and pattern sheet it is on. The actual technical drawing for the pattern is not on the pictured main magazine. You have to spot the information next to the stylish model picture that tells you:
- (1) the pattern number (mine is 8701)
- (2) the pattern sheet it is on (Sheet B)
Step 7 – Study the line drawing and the pattern pieces. Take time to look at the pattern pieces and the threadbare instructions. This is similar to cooking in that when you are trying out a recipe you read through it to see that you have the ingredients and the know-how to make it.

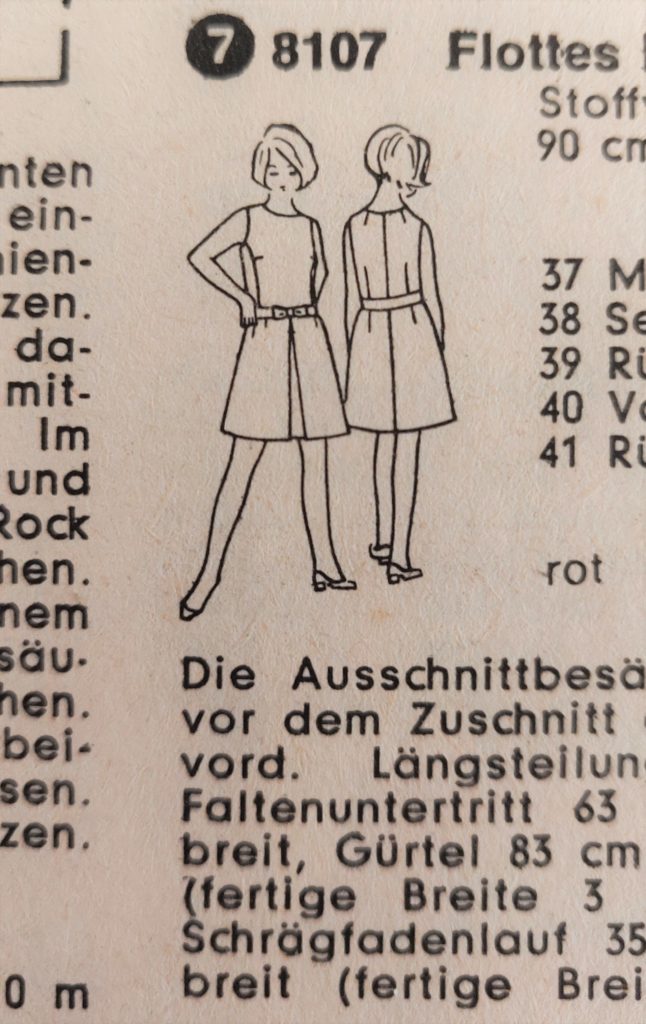
When looking at the line drawings – try to familiarise yourself with how the sewing project might come together. You should also check if there are any draft-it-your self pattern pieces. Burda tries to make things easier by not making you trace rectangles. These tend to be drafted straight on to the fabric.
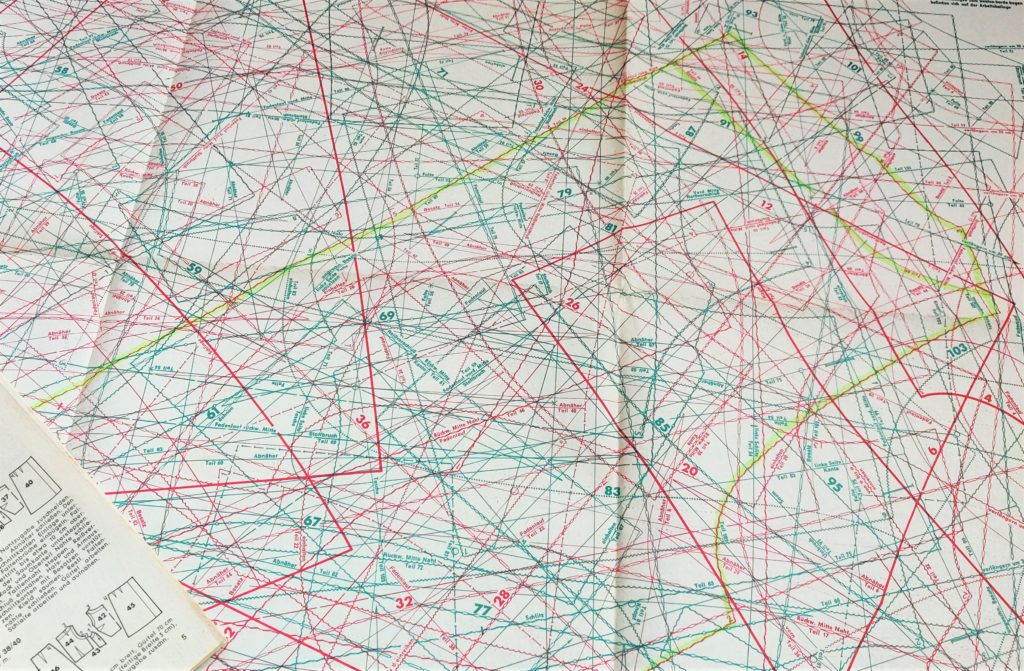
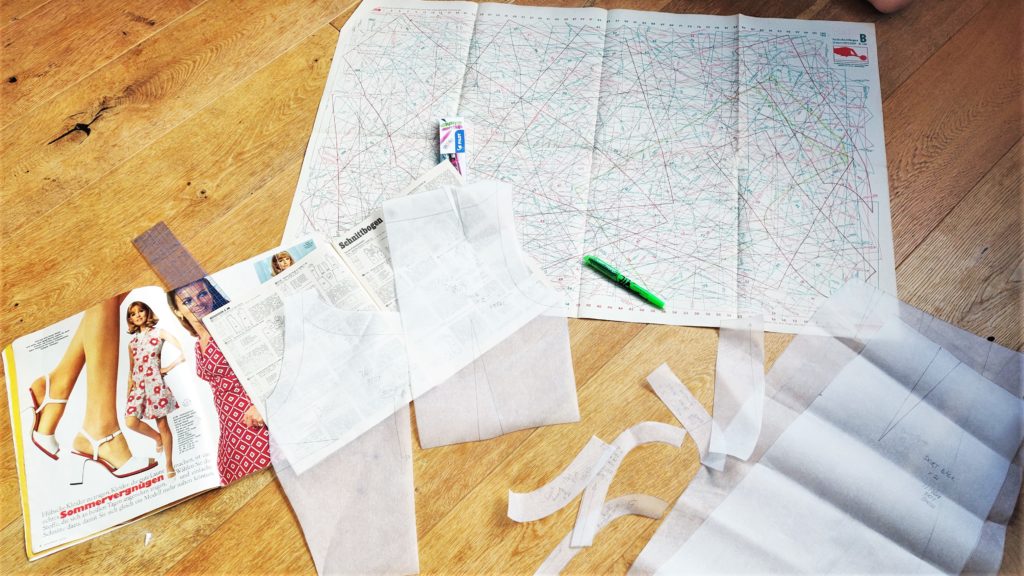
Step 8 – Get the pattern sheet and “see” your pattern pieces. Do you remember when you were a kid and you got the 3D pictures that you had to look at a certain way before the picture jumped out at you? Burda is nothing like that. It’s much easier – you are given “co-ordinates” which show you where, within the mass of entangled lines your pattern piece is located. Just like reading a map.
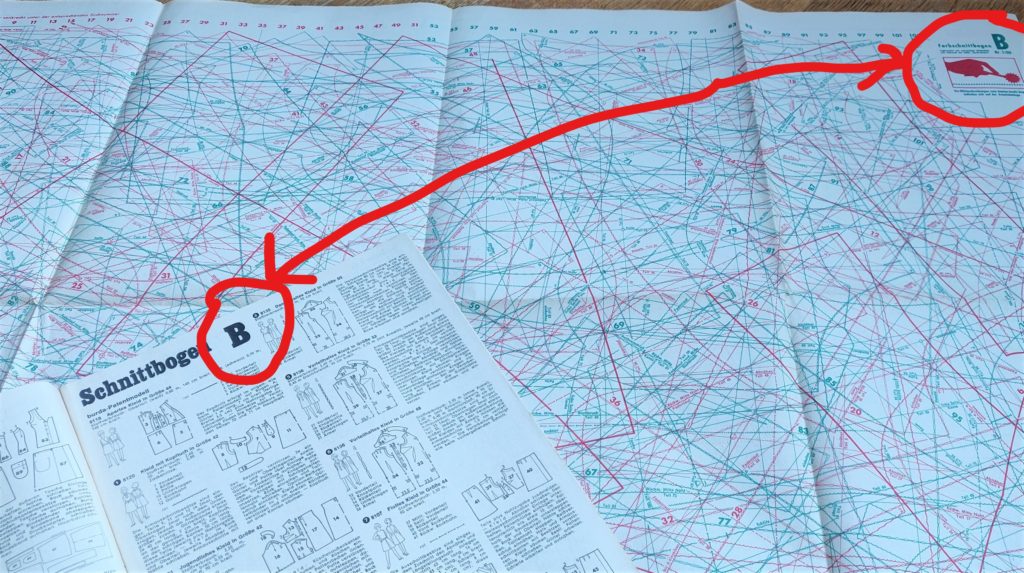
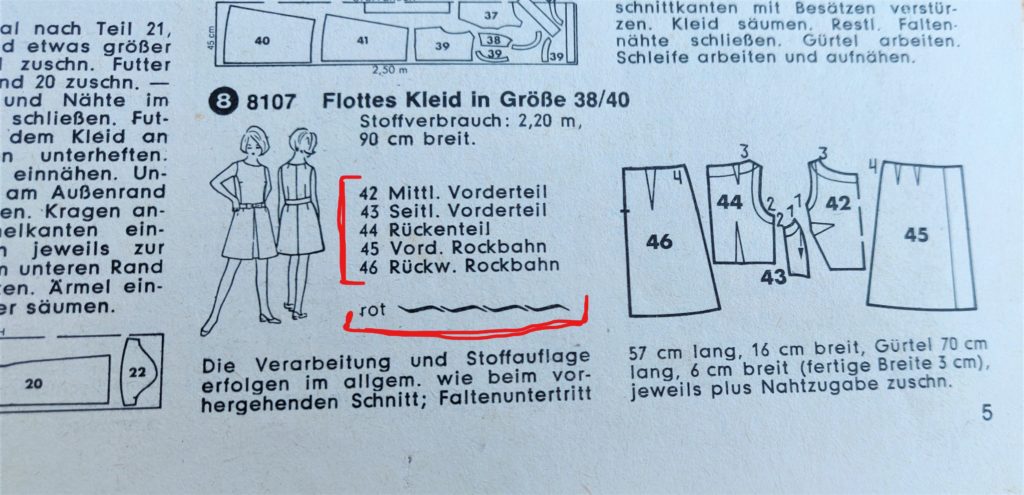
In this example pattern piece 44 is the back skirt and so I find it on pattern sheet B along the top or bottom line. We know its red because the instruction booklet says red.
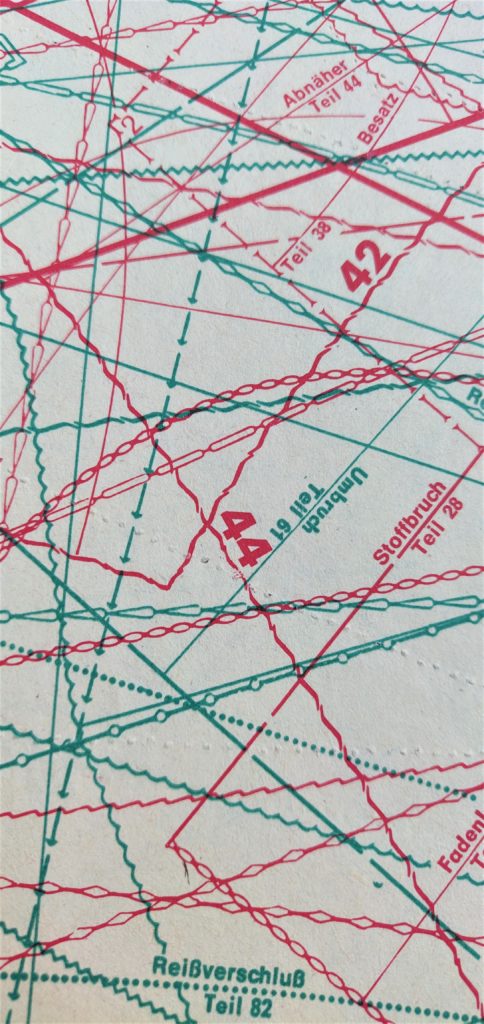
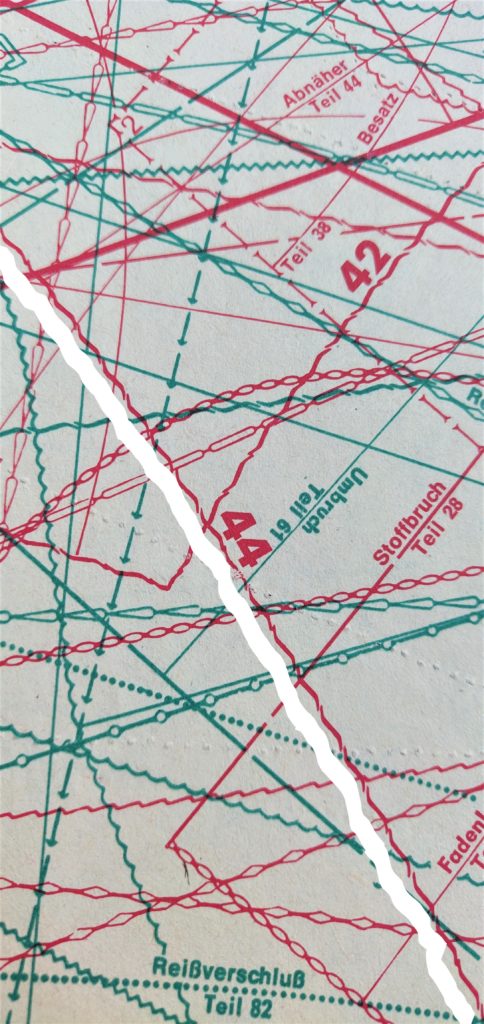
Once you find the number along the edge of the pattern sheet, follow the line of the number vertically up (or down if your number is at the top of the sheet) until you see the number. Viola! You found your pattern piece.
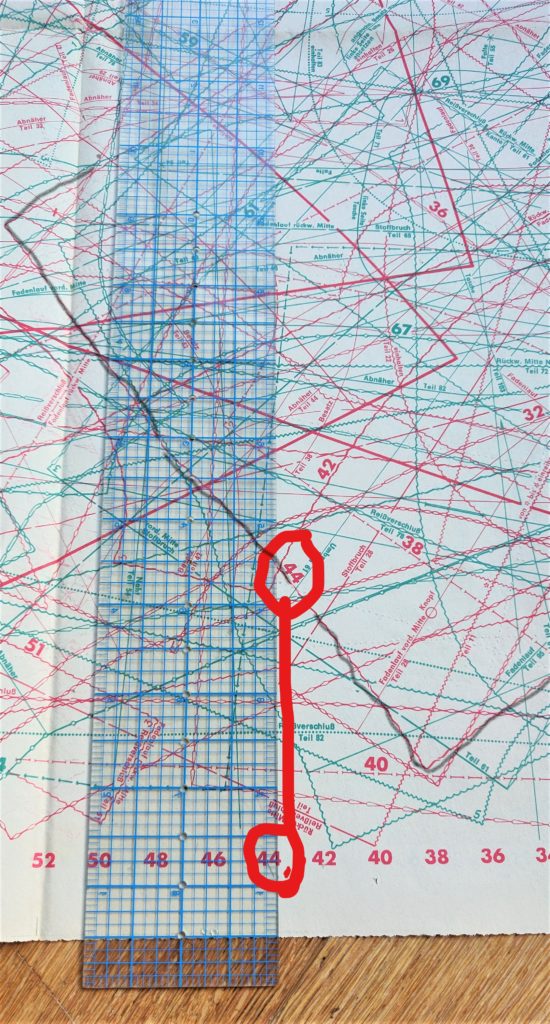
Then you note the type of line used for the pattern and you follow it all the way around to “see the pattern piece”.
Bonus Tip – The pattern piece number (i.e. 44 in my example will always be on the inside side of the line. That helps you expect which direction to go once you find your number.
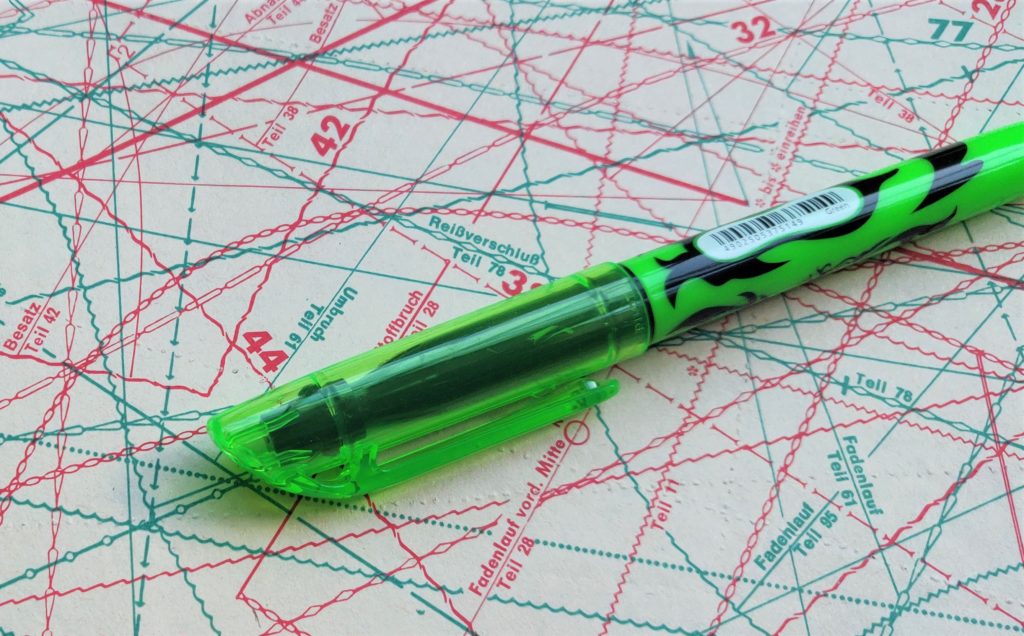
Step 9 – Gather your tracing tools. I use catering size baking parchment that is 45cms wide for tracing paper. My trusted 18″ x 2″ quilting ruler is perfect for adding seam allowances. If you struggle with tracing then I advise these heat erasable highlighters. I recorded a product review of them on my sewing Youtube channel which can check out here if you want to see how they work.
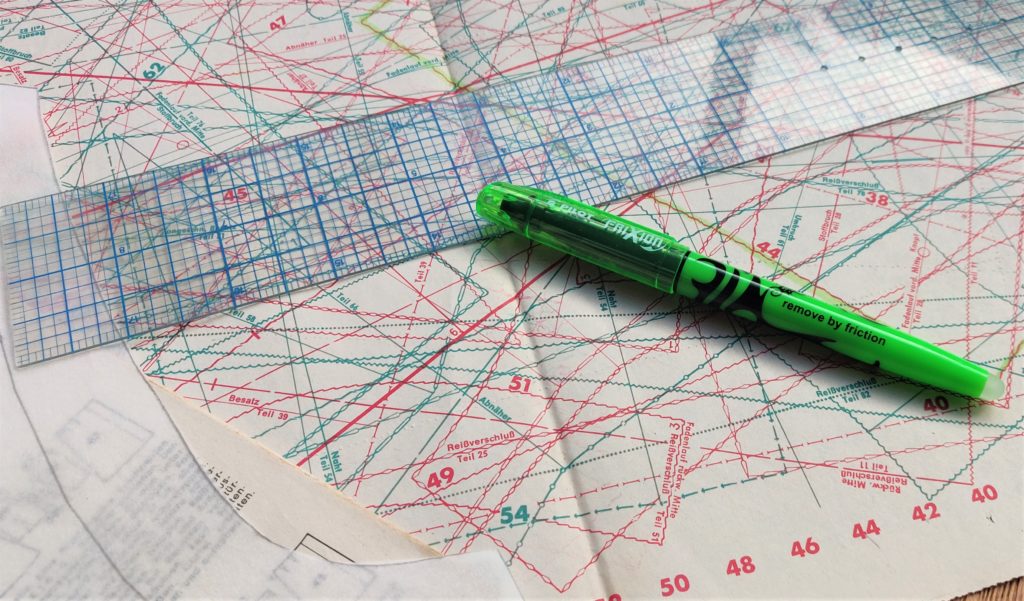
I am obsessed with erasable highlighters – they have been a game-changer for me. You can see how I traced the bodice outline, for example, to show on this post.
This is the most challenging section if you are new to tracing. By the time you look to trace the second pattern piece, it gets easier. It really does.
Pro TIP – Start with the smaller pattern pieces – you can build up the skill and gain momentum that way.
Step 10 – Make a note of the darts and any facings that are drawn on. It helps to keep your instruction booklet nearby so you can refer back to the technical drawing to check where the darts and facings lines might be located.
You need to do this before you declare a pattern piece completely traced. It really sucks when you realise you missed out on some aspect of the pattern and have to go and find it again. I have many a project that stalled at this stage. I triple check before I move to the next pattern piece.
Pro TIP – Tick off each pattern piece that you traced. It is easy to get muddled up and skip or repeat a tracing a pattern piece. Especially if it is an advanced design that has many pattern pieces.
Pro PRO TIP – My own personal strategy that has helped reduce the skipping errors has been to trace the pattern pieces in numerical order e.g. in this dress pattern, the first pattern piece is 44 so I’d start with that, then number 45 then 46 and so on. Its poka-yoke way of ensuring that I don’t miss anything.
Step 11 – Trace out and double-check triple check against the instruction booklet. I cannot emphasize this enough – take the time to check that you have all the markings and the seam numbers. The seam numbers tell you which seams is sewn where – makes sewing life a lot easier.
Step 12 – Create the facing pieces. Most of the patterns have facing lines drawn onto them for you to trace out. This is a more accurate way of ensuring that the facings exactly fit the pattern pieces.
Remember to fold out any darts when tracing facings. In my dress project, the back bodice has shoulder darts for shaping so they had to be folded out.
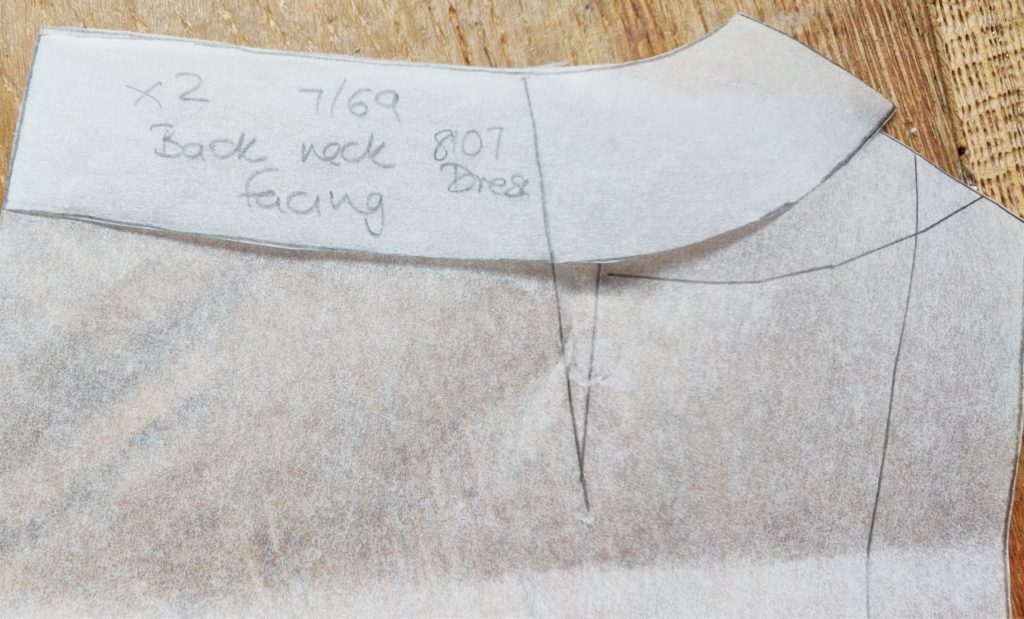
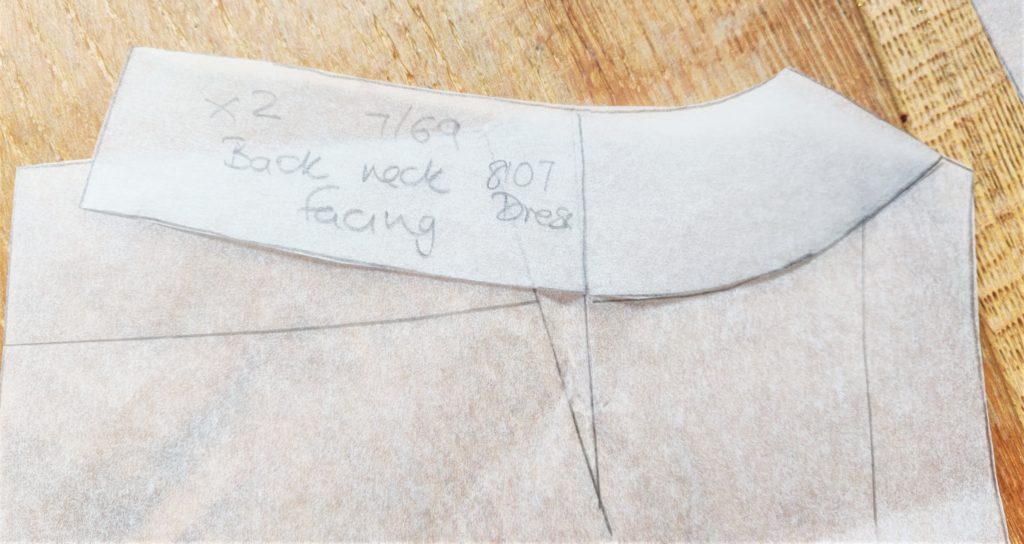
I traced the back facing pattern piece up to the first dart leg and the shifted to the second dart leg to finish the facing. Then double-check afterward that the facing pieces neatly lays on top of the neckline/armhole.
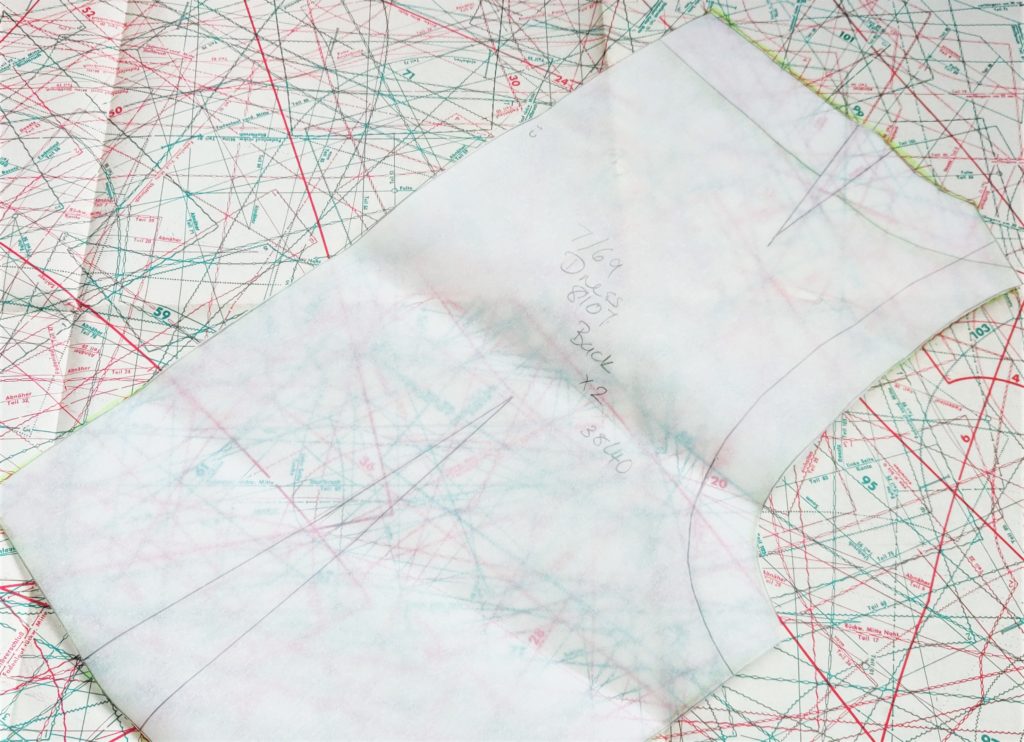
Step 12 – Label your pattern pieces. How many times did I find a random traced pattern piece while tidying up my sewing room and have no idea to which sewing pattern it belongs? Too many to count – so please set yourself up for successful sewing by labeling your pattern pieces.
Make sure to include :
- Year/Month,
- the pattern number,
- the name of the piece,
- how many to be cut,
- the size you traced,
- whether you included seam allowances and
- if so, the size of your seam allowances.
Bonus Tip – Practice your technical line drawing skill by drawing a quick sketch of the style on the pattern piece. When I do that to my traced pattern pieces I don’t have to look them up on a phone when I am organizing them later.
FAQ – Do Burda patterns have seam allowances?
No, they do not. You have to add the seam allowances yourself. What you are tracing out are the stitch lines of your sewing projects.
I made an in-depth video tutorial sharing 5 different ways to add seam allowances to your traced sewing patterns which you can watch here on my Youtube channel.
I will do a post on the benefits of working with dressmaking patterns in this way. It really does improve your dressmaking skills when you learn to use patterns without seam allowances.
And et voila – you are done with tracing a vintage Burda pattern! Well done you crazy thing you and go have a celebratory wine/gin and tonic/chocolate/ whatever celebratory thing you do. Trust me – it gets so much easier after the first time.
And now you have opened your handmade wardrobe up to the rich and varied potential of vintage Burda magazines. Oh, the joy!
More Burda sewing pattern reviews and projects
I hope you enjoyed this post on how to trace vintage Burda patterns from the sewing magazine. Next time I will post about how best to look after your vintage magazines and conserve them for future use.
Are Burda patterns easy?
What’s your pro tip for tracing vintage sewing magazine patterns?
If you enjoyed this deep dive into vintage Burda please check out my other deep dive posts –
The Ultimate Guide to Petersham Ribbon
Pin, Share and Save for later


kate
February 21, 2020 8:56 pmMy Nana would always put her paper and some carbon paper under the pattern sheet – and then run along the lines with a tracing wheel – that way she could see which line was which easily. I think that might of been the standard way of using those patterns – big sheets of carbon paper were readily obtainable in several different colours.
Hila
March 7, 2020 6:18 amThanks for sharing that tip Kate. I will look up carbon paper.